quick-vm
🛡 Making a Stealth VM
This Section is inherently always Work-in-Progress (see r/VFIO)
If you need to mask your VM from checks that a few programs do to restrict users from using certain programs inside a VM for various reasons (like Video Games), then this section is for you.
This method does not support hacking/cheating in video games.
Do what you want at your own risk, DO NOT blame me if you get your account banned or get yourself caught using a VM.
⚠️ Things to keep in mind
- Windows 10 Home is not supported as it DOES NOT have the Hyper-V feature unlike Pro and Enterprise.
- Visit r/VFIO for the latest updates and workarounds for your problems, as this guide is heavily been influenced from the work done by the awesome community over there.
- It is recommended to not install VirtIO Display drivers if you are going to passthrough a GPU (onboard/dedicated) later on.
- We are fooling Windows Apps and Softwares, and not Windows itself, because it would be way more hectic, unreliable, and at the end of the day not ideal.
- You might experience some performance overhead in VM if you decide to deploy this setup.
- Using a normal Windows VM for Non-DRM/Anticheat purposes is encouraged.
- Sometimes running a kernel older than the recent Windows Update might cause a bootloop of the VM. So either only enable security updates (use this), or keep up with the recent Kernel Versions, or just don’t update Windows that frequently.
- Debloating Windows is beneficial & adviced as it could have a lot less overhead as Windows continues to bloat up.
🚀 Getting Started
If you haven’t enabled Virtualization and IOMMU, check out 🔖 DIY VM (Everything From Scratch)
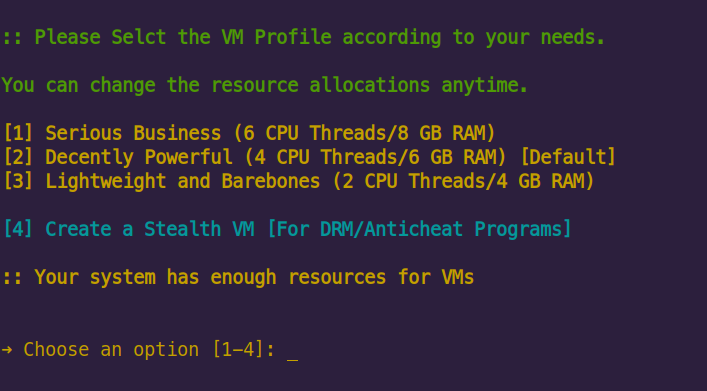
- Run the One-liner in the Terminal.
- Select
Advanced Setupand go toSelect a Custom VM Profile - From there, select
Create a Stealth VM, and you will have a Stealthy VM ready (almost) in a few seconds.
| Select the Stealth Profile |
|---|
 |
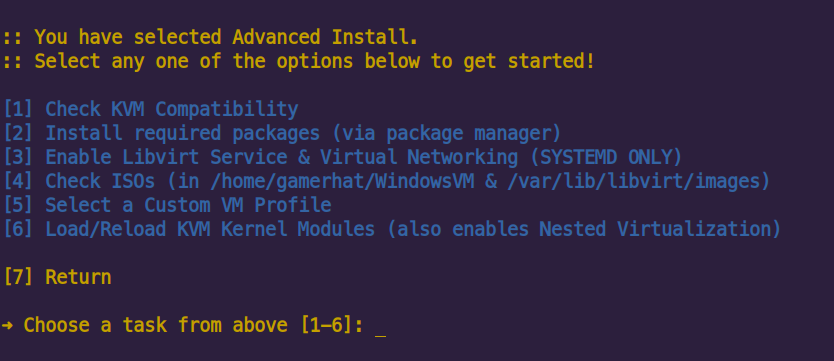
- In
Advanced SetupselectLoad/Reload KVM Kernel Modulesto enable Nested Virtualization.
| Modprobe - Enable Nested Virtualization |
|---|
 |
-
Start Windows 10 Stealth VM (Reboot if it doesn’t start and do the previous step again)
-
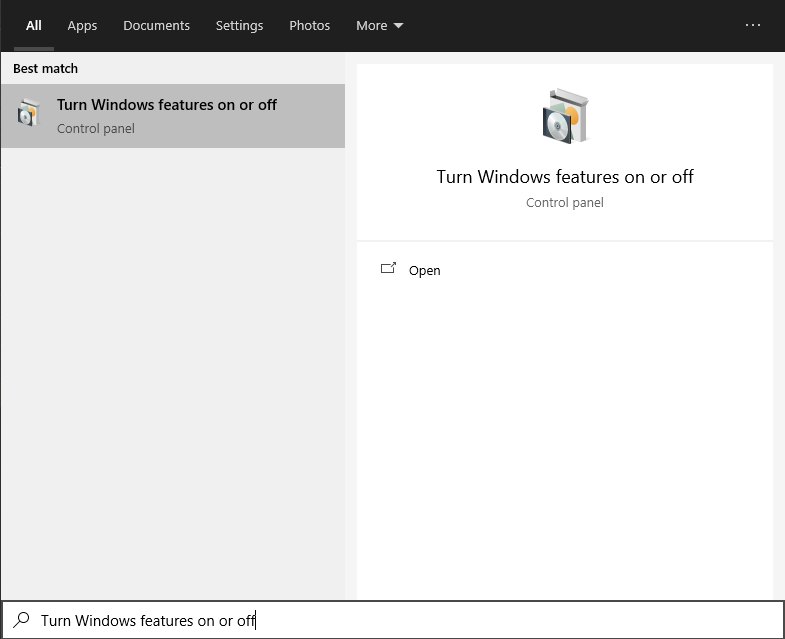
It should boot like normal Windows. Once you are past the Windows Install, go to Turn Windows Features On or Off.
| Search for Windows Features menu |
|---|
 |
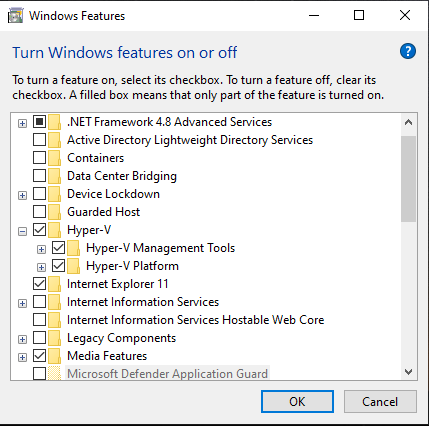
- Click the ▼ dropdown menu for Hyper-V, and check both of the boxes as shown below.
| Enable Hyper-V |
|---|
 |
-
After enabling Hyper-V, you will be asked to REBOOT, do it from that prompt itself and not from the Start Menu.
It is necessary to restart using Windows’ built in method. If you face a bootloop in Windows, try switching to the latest kernel available to you. I have personally tested it on 5.10 LTS without any problems, but your mileage may vary.
Windows should now boot with Hyper-V Hypervisor enabled, and you are now running a Nested Windows Virtual Machine, which slims down the chances of VM detection by a lot.
Microsoft’s Hyper-V Hypervisor is a hardware-based virtualization program that can run VMs with hardware acceleration (though not as great and efficiently as kvm).
Windows is using Hyper-V to mask our VM from other applications. But that means Windows does know that is is being Virtualized.
Documentation
A lot of documentation about configuring CPU, Hyper-V enlightenments has been given by RedHat in their KVM docs, which makes troubleshooting easy.
Every system is necessarily different, and so it’s best that you read some documentation and add some flags in XML as per your requirements to make the VM more stealthy.
Also read How Anti-Cheats detect System Emulation to know more about how Anti-Cheats detect systems that are Virtualized.
Better Storage Disk solution
Using a qcow2 Virtual Disk (VirtIO) is faster than using SATA, as it avoids emulating SATA entirely. But even that can be a bottleneck, and there is obviously a better way to do it.
One of the easier methods is given by Wendell, from Level1Techs in this video, which involves passing through an entire SATA or NVME controller to the VM along with a drive.
For this, Windows and VirtIO drivers must already be installed normally on bare metal, before the Drive and Bus Controller are passed throug are passed through.
GPU Passthrough for Stealth VMs
- Single GPU Passthrough method works, but isn’t heavily tested yet.
- DO NOT USE
vendor-reset-dkmsif you have a newer AMD GPU.
NVIDIA’s driver 465 and newer support GPU Passthrough to a Windows Guest on a Linux Host.
NOTE: NVIDIA still doesn’t support SR-IOV so you will need an iGPU or a separate GPU if you want to be able to access the Linux Host.
If you don’t want to use a second GPU, check out Single GPU Passthrough by joeknock90
So if you need to passthrough an NVIDIA or AMD GPU without making it obvious that you are using a VM, add the following lines to your XML.
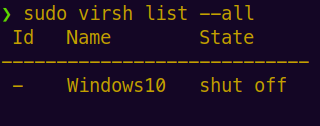
1. List all VMs
sudo virsh list --all
2. Edit the VM config
sudo virsh edit Windows10
3. Enter the following text between the already existing sections. You can replace randomid with AuthenticAMD to fix issues on RX 5000 and older AMD GPUs.
...
<features>
...
  <hyperv>
  ...
    <vendor_id state="on" value="randomid">

  </hyperv>
  <kvm>
      <hidden state='on'/>
  </kvm>
...
</features>
...
More Useful Guides
If you need something specific, or something didn’t work for you here, make sure you give these a look. Many people who have experience with this stuff have wonderful guides that you should check out.
- SomeOrdinaryGamers’ BattleEye bypass - Modifying somethings in the kernel to mitigate some checks
- Clayfreeman’s GPU Passthrough
📣 Credits
- The Entire r/VFIO Community! ❤️
- SomeOrdinaryGamers - For Vanguard bypass
- Zeptic - For helping solve various issues